Alphajet is a steganography task that was available during the LeHack’s
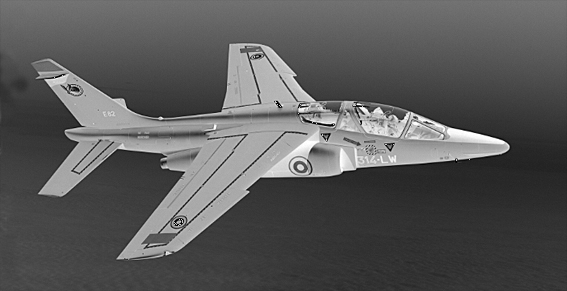
wargame. We are given an image
with the .pgm extension.
As browsers can’t display such files without a canvas, here is a PNG equivalent, just for preview:
The format
I don’t know this format, what is this?
$ file alphajet.pgm
alphajet.pgm: Netpbm image data, size = 567 x 291, greymap, ASCII text
Let’s take a look at the appropriate Wikipedia article. It looks very simplistic. It seems that this format exists in both binary and ASCII format. Our image is plain ASCII.
The file starts with a magic number. In our case:
$ sed -n 1p alphajet.pgm
P2
So we are dealing with a gray scale image.
On the next line, the two numbers indicate the width and the height of the picture:
$ sed -n 2p alphajet.pgm
567 291
Great! The third line is an additional parameter for gray scale images that indicates the “highest” color used in the image:
$ sed -n 3p alphajet.pgm
254
0 is black, whereas the maximum value is white. 254 actually looks wrong as
the file contains some pixels equal to 255, although the macOS Preview
application I used to display the image did not seem to care.
The rest of the file is just a list of numbers between 0 and 255. Each one
of these numbers is a pixel of the image.
The scripts presented in this article take advantage of the fact that the image we are given only has one pixel per line. It is not the case of most PGM files.
$ sed -n 4,15p alphajet.pgm
147
140
140
145
141
140
140
144
143
143
142
142
Solving the task
I did not manage to solve the task during the CTF even though I spent some time playing with the file (see the end of the article for more). On the day after, a friend told me that some pixels looked off and that is could be a LSB.
Note: LSB stands for Least Significant Bit. It is a very common steganograpy technique. Please, see this great article if you want to know more.
After some scripting, I find that the LSB is always set, which does not allow any room for hidden data. So I think I would try to extract the most significant bits (MSB) instead. Here the Python script I use:
#! /usr/bin/env python3

import sys


def extract(path):
  with open(path, "r") as file:
    # Load the whole file into memory
    content = file.readlines()

    # We store the extracted bits as a string of 0s and 1s
    bits = ""

    # Skip the metadatas
    for line in content[3:]:
      # Convert the current pixel from string to number
      pixel = int(line)

      if pixel.bit_length() == 0:
        # I don't want to handle this later on
        continue

      # Extract all bits
      allBits = [
        "1" if (pixel & 1 << x > 0)
        else "0"
        for x in range(pixel.bit_length())
      ]

      # Get the far left bit, which is the most significant one
      bits += allBits[0]

      # As soon as we have a full byte, print it
      if len(bits) == 8:
        # Parse from binary
        c = int(bits, 2)

        # If it is not printable, skip it
        if c >= 33 and c <= 126:
          print(chr(c), end='')

        # Get ready for the next byte
        bits = ""


def main():
  if len(sys.argv) < 2:
    print("this script takes the path of a PGM file as argument")
    sys.exit(1)

  extract(sys.argv[1])


if __name__ == "__main__":
  main()
Let’s run it:
$ ./msb.py alphajet.pgm | grep "lh_{"

[...]
Leflagest:lh_{EtMy4WiQofuCeMEf8672}.
[...]
Great!
Playing with the format
I did not think about LSB/MSB during the competition but I tried a few other things which produced cool results.
Highest color threshold
The third line holds the highest color used in the image. If we change this parameter, we could create some sort of filter. Here is a script that generates an image for each value between 1 and the maximum value of the original image. The higher this value is, the more colors will be able to pass through.
#! /usr/bin/env python3

import sys


def threshold(path):
  with open(path, "r") as f:
    content = f.readlines()
    # Read the inital max color value
    maxColor = int(content[2])

    # From 1 to the max color value
    for newThreshold in range(1, maxColor + 1):
      print("working on threshold {}".format(newThreshold))

      resultFile = "result/result_{}.pgm".format(newThreshold)
      # Write each threshold
      content[2] = "{}\n".format(newThreshold)

      with open(resultFile, "w+") as result:
        result.writelines(content)


def main():
  if len(sys.argv) < 2:
    print("this script takes the path of a PGM file as argument")
    sys.exit(1)

  threshold(sys.argv[1])


if __name__ == "__main__":
  main()
Here is the result:
$ mkdir result; and ./threshold.py alphajet.pgm
working on threshold 1
[...]
working on threshold 255
$ ls result/
result_1.pgm   result_44.pgm  result_87.pgm   result_130.pgm  result_173.pgm  result_216.pgm
result_2.pgm   result_45.pgm  result_88.pgm   result_131.pgm  result_174.pgm  result_217.pgm
[...]          result_255.pgm
Let’s make a GIF out of the images:
$ convert -delay 1x45 -loop 0 *.pgm threshold.gifIt looks like the image is fading in:
It looks great, although I can’t think about any practical use for this… :’)
The layers
I initially thought that the flag was actually visible in the image, but drawn with such a small color contrast that one could not see it with the naked eye. So I thought I would extract all the “layers” of the image. A layer being all the pixels of a certain color.
According to the max value parameter of the picture, there is at most 254 layers. In practice, there is actually 255 (1 to 255).
Here is a script to extract such layers:
#! /usr/bin/env python3

import sys


MIN_COLOR = 1 # Minimum color layer
MAX_COLOR = 255 # Put here for consistency, is overriden later on


def extract_layer(color, tolerance, original):
  newFile = [] # Empty
  newFile.append(original[0]) # Magic
  newFile.append(original[1]) # Sizes
  newFile.append(original[2]) # Max color

  # For each pixel
  for line in original[3:]:
    # Get color
    pixel = int(line)

    # If it fall in the tolerance zone
    if pixel >= max(color - tolerance, MIN_COLOR) \
        and pixel <= min(color + tolerance, MAX_COLOR):
      # Keep it
      newFile.append("{}\n".format(pixel))
    else:
      # Otherwise, it will be black
      newFile.append("1\n")

  # Save result
  resultFile = "result/{}_{}.pgm".format(color, tolerance)
  with open(resultFile, "w+") as result:
    result.writelines(newFile)


def layers(path, tolerance):
  with open("alphajet.pgm", "r") as file:
    content = file.readlines()
    # Get the max color, override the default one
    MAX_COLOR = int(content[2])

    # For each possible layer
    for i in range(1, MAX_COLOR + 1):
      print("working on color layer {}/{}, tolerance {}"\
            .format(i, MAX_COLOR, tolerance))
      extract_layer(i, tolerance, content)


def main():
  if len(sys.argv) < 3:
    print("this script takes the path of a PGM file as argument, \
          and a tolerance number")
    sys.exit(1)

  layers(sys.argv[1], int(sys.argv[2]))


if __name__ == "__main__":
  main()
The tolerance allows to grab the adjacent colors and get different results. With tolerance 1:

With tolerance 10:
With tolerance 70:
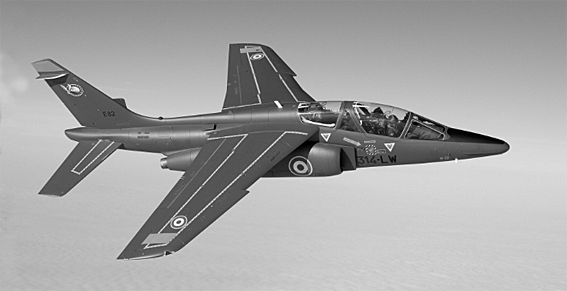
Negative mode
We can create a negative version of the image by substracting each pixel value to the maximum one:
#! /usr/bin/env python3

import sys


def revert(path):
  with open("alphajet.pgm", "r") as file:
    content = file.readlines()

    newFile = []
    # Copy magic, dimensions and max color
    newFile.append(content[0])
    newFile.append(content[1])
    newFile.append(content[2])

    # Save the max color
    maxColor = int(content[2])

    for line in content[3:]:
      # Invert each color
      newFile.append("{}\n".format(maxColor - int(line)))

    # Save the result
    resultFile = "result/revert_{}.pgm".format(maxColor)
    with open(resultFile, "w+") as res:
      res.writelines(newFile)


def main():
  if len(sys.argv) < 2:
    print("this script takes the path of a PGM file as argument")
    sys.exit(1)

  revert(sys.argv[1])


if __name__ == "__main__":
  main()
Here is the result, converted to PNG: